
![You are currently viewing [Fixed] Windows Modules Installer Worker High CPU & Disk Usage](https://techiwiz.com/wp-content/uploads/2021/08/Untitled-design-1.jpg)
If you’re reading this article then you must be facing a system slowness issue cause of Windows Modules Installer Worker High CPU & Disk Usage.
We’ll talk about in detail and will perform multiple possible solutions from basic to advance. You’ll learn and get confident after resolving this type of issues.
Table of Contents
Symptom: System Slowness Issue
Your system could slow down due to many reasons. Slowness issues can be caused by hardware, operating systems, third-party apps, viruses, and other factors.
It’s usually due to excessive system resource usage. When a process uses more CPU, Memory, Hard disk, or network resources, your system may respond slowly or hang.
You can also confirm by going to the Task Manager and checking the Process & Performance tab.
- Steps: Start –> Search –> Task Manager
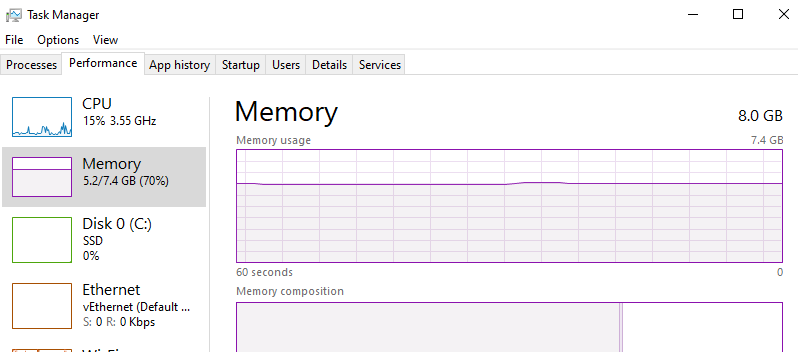
You can get the process name that consuming high CPU and Disk resources.
There are many processes that cause this but, in this article, we’ll talk about the Windows modules installer worker process.
Is Windows Modules Installer Worker a Malware or a Virus?
After examining the high utilization, your first question will be: Is Windows modules installer worker any malware or virus?
The clear answer to this question is NO. You don’t have to be afraid of like any viruses or malware. It is a Windows service-related component that is used to search and install the latest updates.
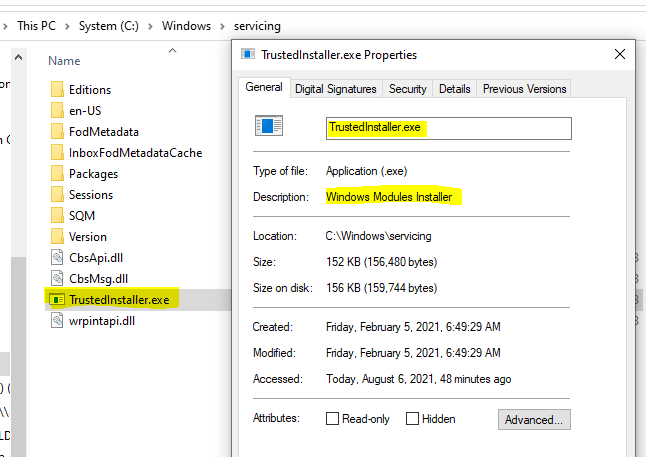
It could happen that its files get infected by a virus. So, you can also scan its executable file with any installed anti-virus to make sure it’s clean, file location is C:\Windows\servicing.
What is Windows Modules Installer Worker?
Firstly, let’s understand what is Windows modules installer worker?
Windows modules installer worker is a system service and plays an essential role in system management. It’s used by Windows to automatically check and install the latest updates. Windows modules installer worker is also used to modify and remove the updates.
You may check its details in the Services.msc console.
- Steps: Start –> Search –> Services

In other words, when you manually or the system automatically checks for the updates then this process runs in the background.
What is Tiworker.Exe and Trustedinstaller.Exe process?
You may see any single or both Tiworker.Exe and Trustedinstaller.Exe processes in the Task manager high usage process list.
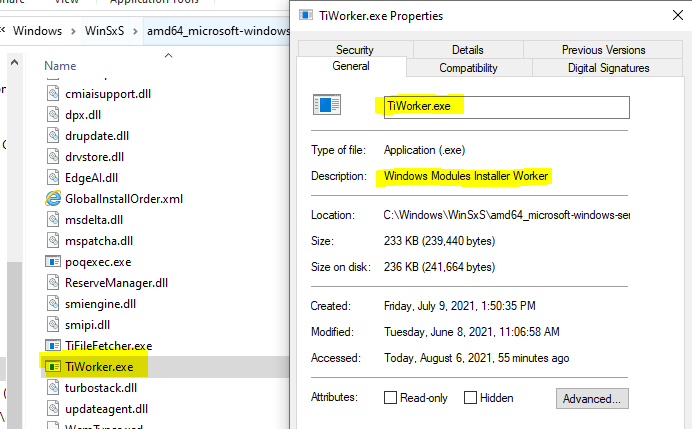
Tiworker.Exe is an executable file that display name is Windows modules installer worker.
Trustedinstaller.Exe name will show as process name and its display name will show as Windows Modules Installer.
It is the parent process of Tiworker.Exe and both are part of Windows Modules Installer and run in the background to complete the update task. You should understand that Trustedinstaller.Exe is used to install the updates and enable the windows features.
Why Windows Modules Installer Worker Utilize high CPU & Disk Usage?
You may be now wondering why Windows modules installer worker utilize high CPU & Disk Usage on Windows 10 systems?
It has happened many times that a Windows update installation is in progress or there is a bug in any received update file. Then it starts using available CPU and Disk resources.
This can also happen when its components are corrupted and causing unexpected system behavior.
As per my experience sometimes it’s normal because if an update installation is in progress, then the time taken is expected. Once the installation gets finished automatically it’ll release the used CPU resource.
You can calculate the update installation time, on the basis of size and number of updates files.
How To Identify Windows Modules Installer Problems?
It’s normal when it’s installing the Windows updates and utilization get high.
But it’s not common when an update keeps getting failed on the system like Windows 10 and utilization keep showing high in Task Manager.
It could be an issue if you receive an error message such as ‘please update windows module installer’ or the service is not running while updating.
Follow Troubleshooting Approach Like an IT Professionals:
Now you’ve understood that how to check when your Windows 10 system starts responding slow.
You should follow the right troubleshooting approach to resolve any system-related issue. It’ll save time and effort for you & your users.
Basic Troubleshooting to Fix Windows Modules Installer Worker High CPU & Disk Usage
Firstly, let’s start with basic troubleshooting solutions. If the issue remains then you can perform the below-advanced troubleshooting section steps.
Kill Windows Modules Installer Worker Process
My recommendation is first to let the Windows update get finished.
If high utilization takes a more extended period, you need to work urgently on your windows 10 system. Then try the following steps to kill its process to free the CPU and Disk space.
- Start –> Search –> Open Task Manager
- Click on the Process Tab
- Select Windows Modules Installer and click on End Task button.
After ending the process CPU and Disk utilization will immediately get lower. It’s a temporary solution because it’s required to keep the system up to date.
So you need to let it run later once your system is idle. If still facing any issue then try next steps.
Check Scheduled Automatic Maintenance Running Status
Let’s check if any automatic maintenance job is running and previous run results that could be give a clue of high utilization.
- Open the Automatic Maintenance setting (Control Panel\All Control Panel Items\Security and Maintenance),
- You can check last run date and previous run result to identify if there any error,
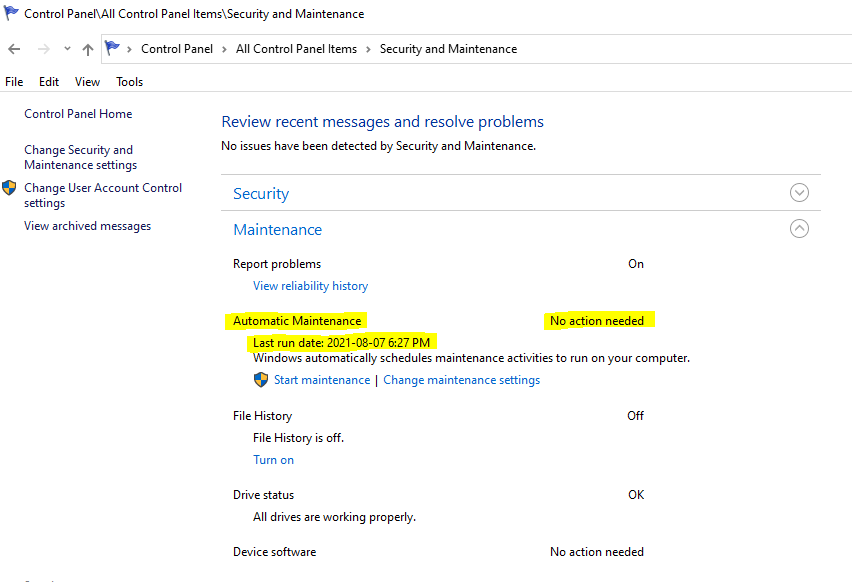
- You can also check its schedule time and change as per your preference,
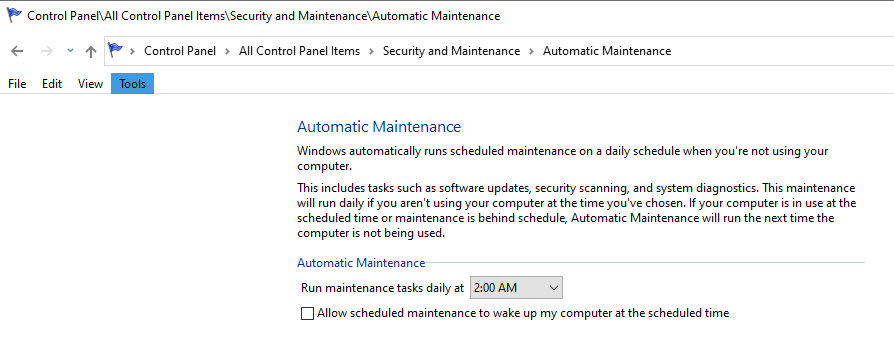
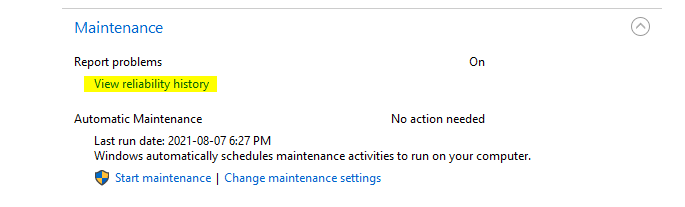
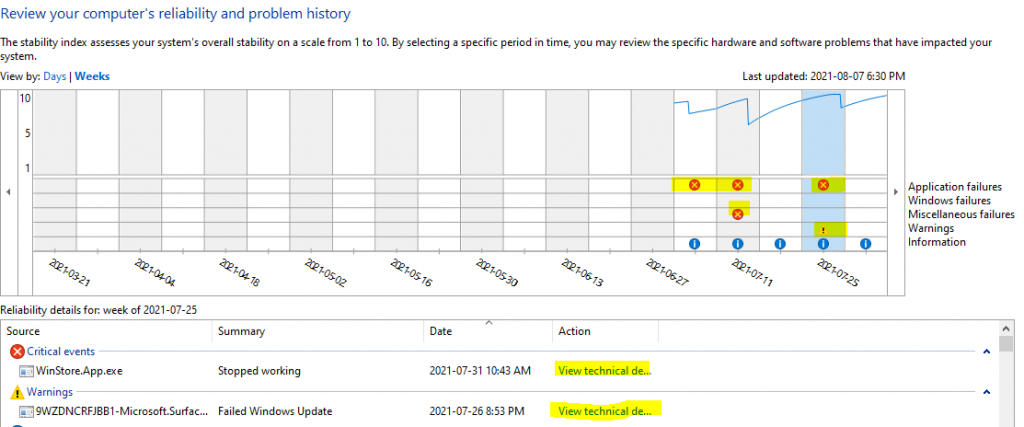
- You should also check the reliability history to find if there is any critical or warning errors are coming.
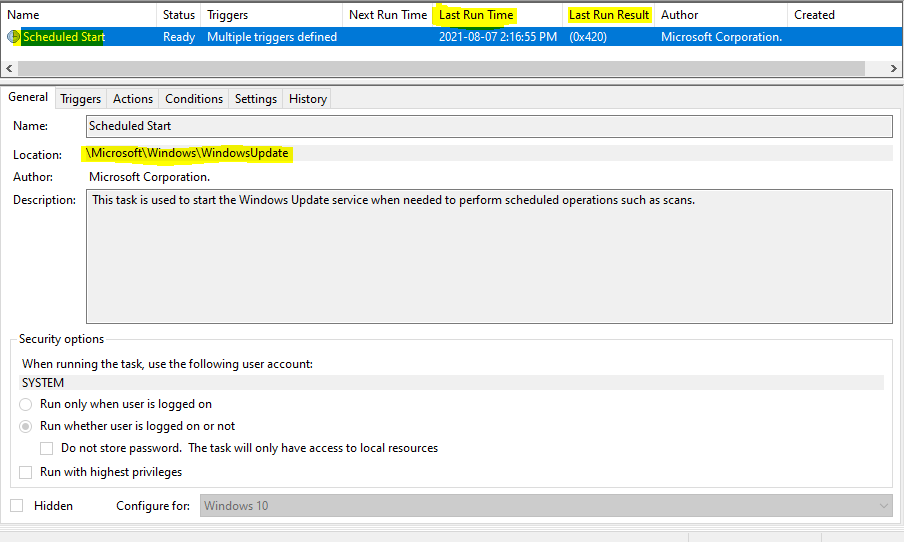
Check Task Schedular Windows Update Task Status
You can confirm the running staus of Windows update through Task scheduler.
There are multiple pre-build schedules yasks are created by Microsoft to manage like Windows 10 OS.
You can check the Windows update task current and for any error in the history status (Path: \Microsoft\Windows\WindowsUpdate) like below screenshot.
Check and Update the System
You should complete the update process once the system is idle if it’s unable to complete in your workig time.
You can also start the update job manually with following steps:
- Click on Start button –> Windows Settings –> Update & Security
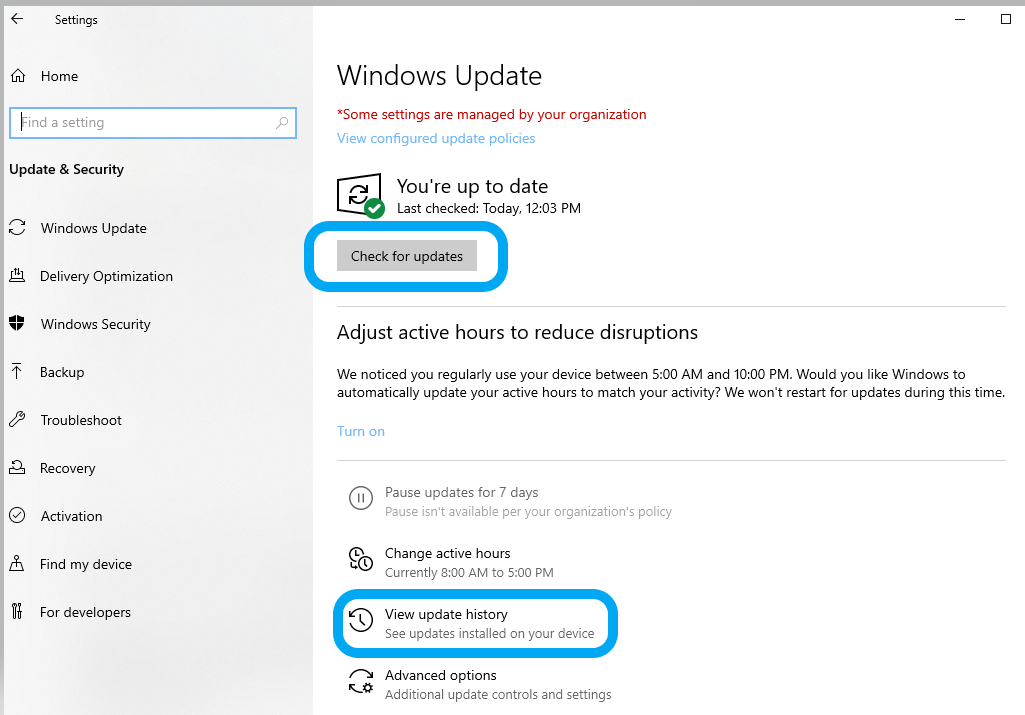
Once the Windows updates are completly installed, this should not take more time in checking new updates.
Restart the Windows Update service
You may also check by restart the Windows update service if it’s not running properly.
- Start –> Search –> Open Services.msc
- Right click on the Windows Update service and restart,
You may also restart the Windows Update service through single line PowerShell comand:
#Restart the Windows Update service
Restart-Service -DisplayName 'Windows Update' -Force
Run the Windows Update Troubleshooter
The Windows Update Troubleshooter can help when you get an error while downloading & installing the Windows updates.
- Start > Search > Troubleshoot Settings
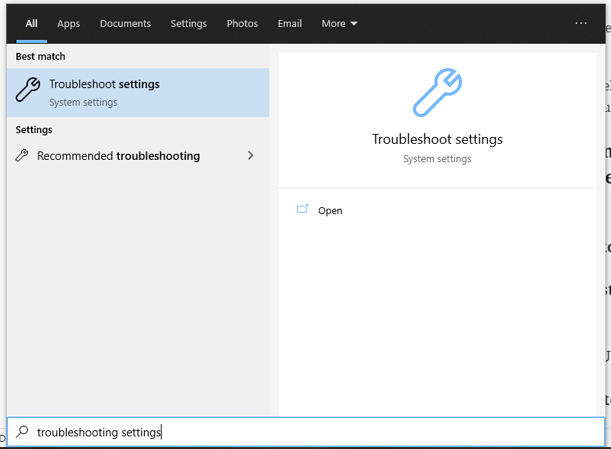
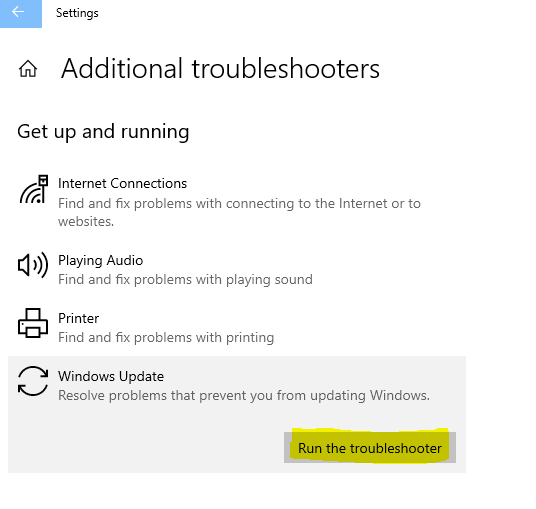
- Then Click on Additional troubleshooters
- and Run the troubleshooter for Windows Update
- After its completion please reboot the system before installing for updates.
- You may also start the Windows update troubleshooter like following old way:
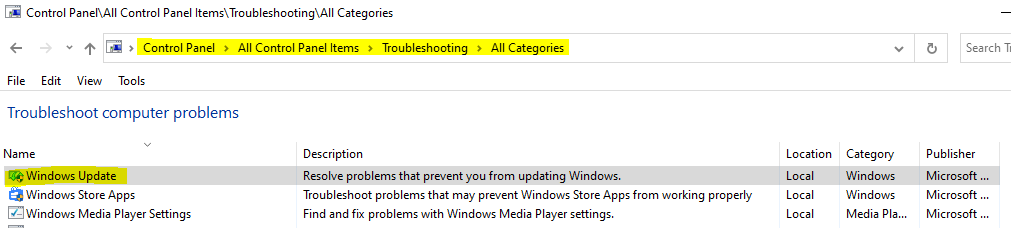
You may also check this page for more info.
Advance Troubleshooting to Fix Windows Modules Installer Worker High CPU & Disk Usage
If you’re still facing issue of Windows modules installer worker high CPU & Disk utilization, after performing the above basic troubleshooting steps.
Then get redy for below advance troubleshooting steps.
Set Windows Update Service to Manual Mode
Microsoft releases the updates every 2nd Tuesday of each month at 10:00 AM PST.
If you’re facing this issue frequently then it would be better to set the Windows Update service from Automatic to Manual mode. Then you can start the update progress accordingly once in a month.
Once you found the root casue and solution then set back to automatic mode.
#PowerShell Command to set Windows Update service type to Manual
Set-Service -DisplayName 'Windows Update' -StartupType Manual
Disable Windows Modules Installer worker on Windows 10?
You may still face the issue even performing above steps.
In that case you can disable the Windows modules installer worker service on Windows 10 system, until it didn’t get fixed completly.
#PowerShell Command to Disabled Windows Modules Installer service type to Manual
Set-Service -DisplayName 'Windows Modules Installer' -StartupType Disabled
Pause Automatic Windows Updates
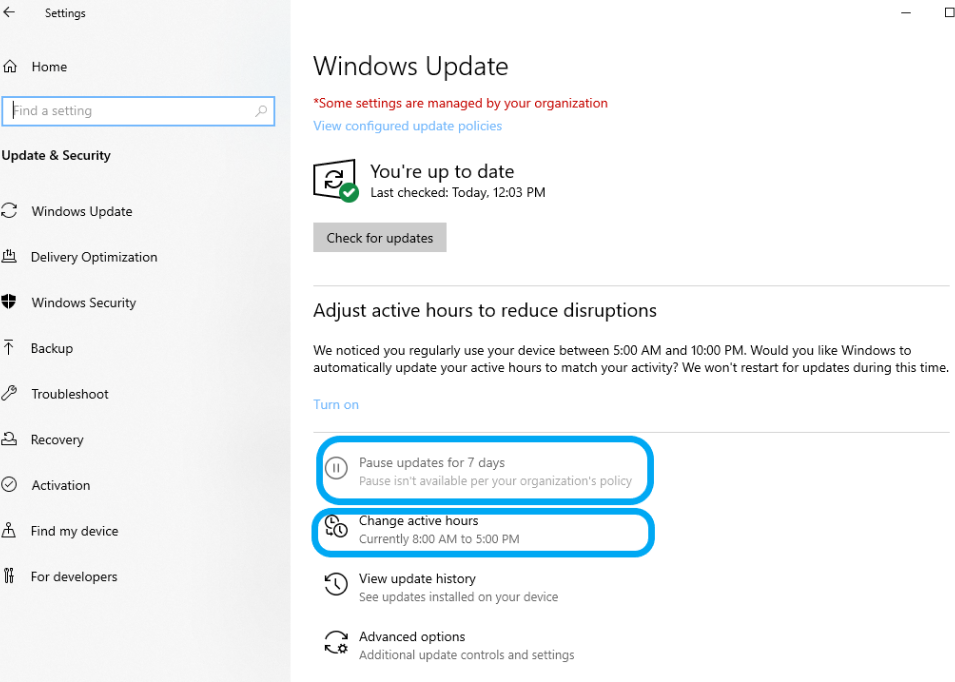
You can also pause the automatic Windows updates installation and set the active hours so that update doesn’t bother you while you’re working.
Enabled metered connection to Limit Bandwidth on Windows 10
You can also control the high utilization of network by set throttling on network bandwidth.
This setting will help you if you’ve limited data plan on network and Windows update is consuming more data bandwidth.
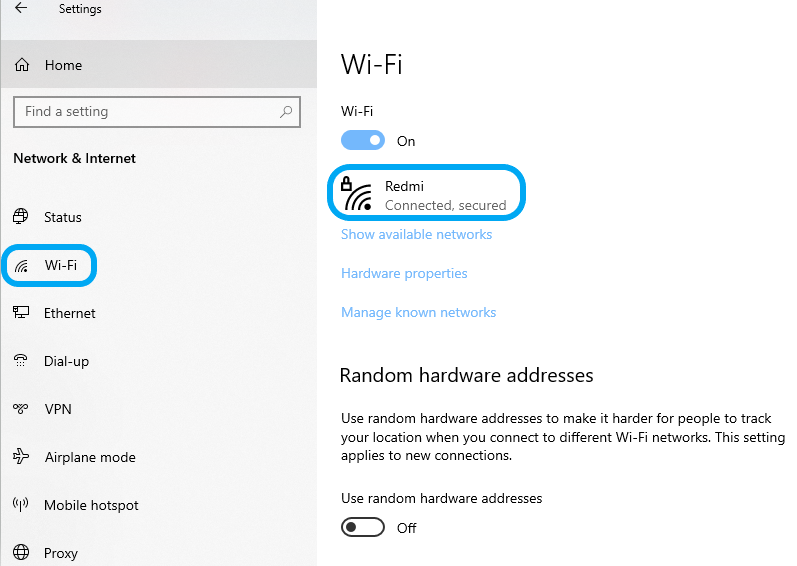
For Wi-Fi Connection:
- Settings –> Network & Internet –> Wi-Fi section > select the Wi-Fi network you’re connected to like below screenshot:
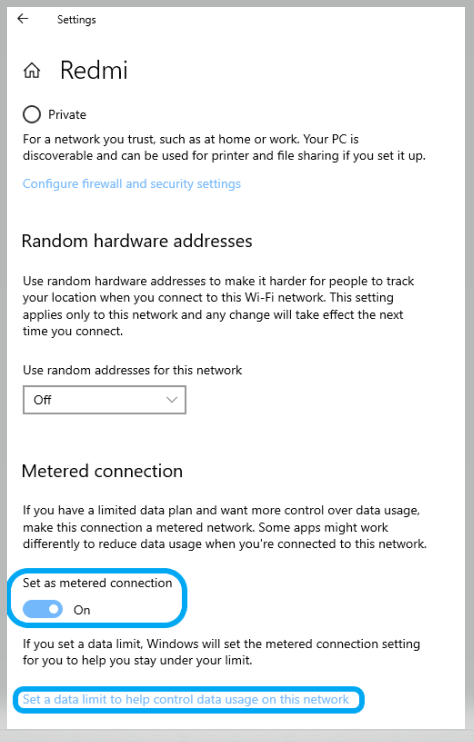
- Move the ‘Set as metered connection’ slider to On
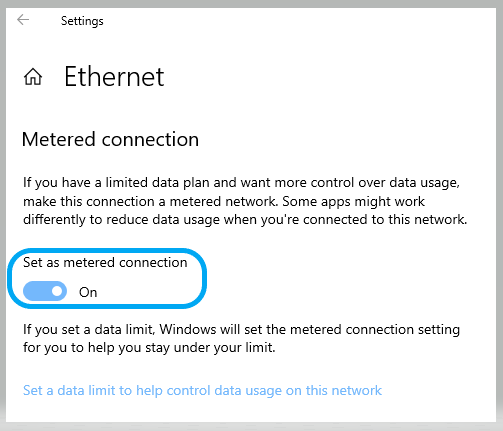
For Ethernet LAN Connection:
- Settings –> Network & Internet –> Click on Ethernet from sidebar –> select the Ethernet network you’re connected to:
- Move the ‘Set as metered connection’ slider to On
Remove Software Distribution Update Folder
Software distribution folder is system directory which used by Windows update service to downloads the updates on local system. It’s directory path is C:\Windows\SoftwareDistribution
It could be a reason for Windows modules Installer worker for high usage, if updates are getting fail or any bug in downloaded update file.
So you should try by rename or delete Software distribution folder on the affected system.
You can try below PowerShell commands to do this job to save time:
#Stop depended services and rename the existing 'Software distribution' folder

Stop-Service -Name wuauserv -Force
Stop-Service -Name bits -Force

Rename-Item -Path 'C:\Windows\SoftwareDistribution' -NewName 'C:\Windows\SoftwareDistribution.bak'

Start-Service -Name wuauserv -Force
Start-Service -Name bits -Force
Set Windows Modules Installer Worker Process to Low Priority
When you don’t want to disable or kill it’s service then you can change its priority low to prevent high usage.
- Set TrustedInstaller.exe process priority to Low or Below normal in the Task Manager.
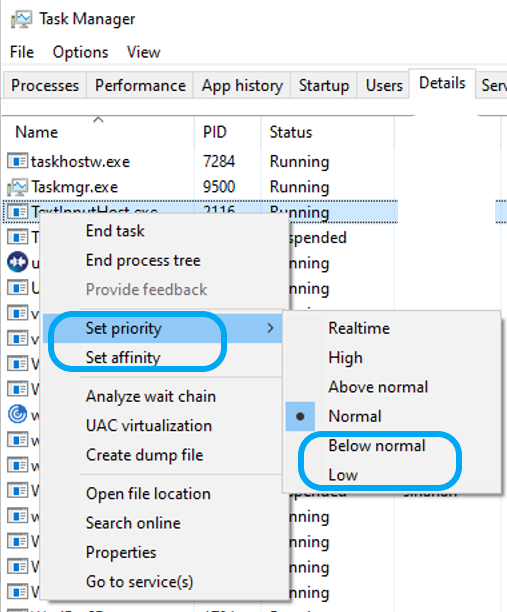
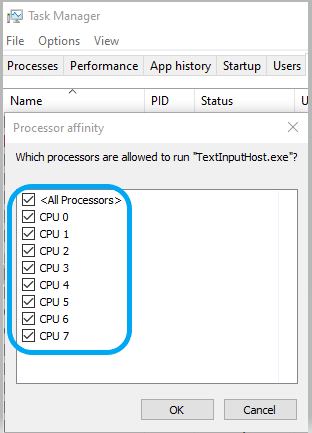
- You can also set affinity for TrustedInstaller.exe process to use selected CPU only not all by default.
Execute System File Checker
When a Windows components and services aren’t working or Windows crashes, you should check it by run System File Checker to scan and restore windows files.
Run sfc /scannow command in command prompt to scan all protected system files, & replace corrupted files.
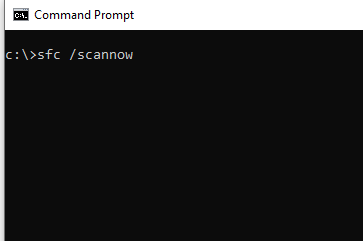
If it finds any corrupted files will replace to solve the issue.
Restore Corrupt System Files through DISM
You need to run following DISM command, When sfc /scannow command unable to repair corrupted system files.
DISM.exe /Online /Cleanup-image /Restorehealth
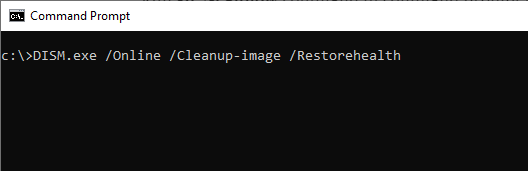
Wait for its completion and then reboot the system before try again.
Please also take following course for more learning….


Summary
We talked about Windows Modules Installer Worker High CPU & Disk Usage cause and it’s components. You also learned multiple troubleshooting steps in detail to resolved this issue with right approach from basic to advance to save time and effort.
Please check this page for more learning resources…..


